


My living room had nice furniture but it still felt like a waiting room. Took me embarrassingly long to figure out it was missing texture and small-scale color layers. I started with a lamp base and a tiny repair on a peeling wallpaper seam. Those two things changed how I see the whole space. What follows are the actual fixes I still use when a room feels flat, dusty, or like it needs permission to be lived in.
These ideas lean between modern cottage and lived-in vintage. Most projects run under $50 with a couple of $100 splurges. They work in living rooms, bedrooms, small apartments, and older houses where plaster needs attention.
Pastel Gradient Lamp Makeover For Eclectic Living Rooms

The moment I layered five pastels on a thrifted lamp, the whole room stopped looking mass-produced. Use a matte black spray base, then work up through two pinks, a soft red, and finish with white on top for a smooth fade. The rule I use is five pastel colors for a gradient on lamp bases, black at bottom to white at top. Buy a soft art pastels pack for the color layers and seal with a proper fixative. I prefer soft-art-pastels-set and spectrafix-pastel-fixative. Common mistake is sealing with a regular matte sealer and watching colors smear. Test on scrap metal first. Expect to reseal yearly if the lamp gets handled a lot.
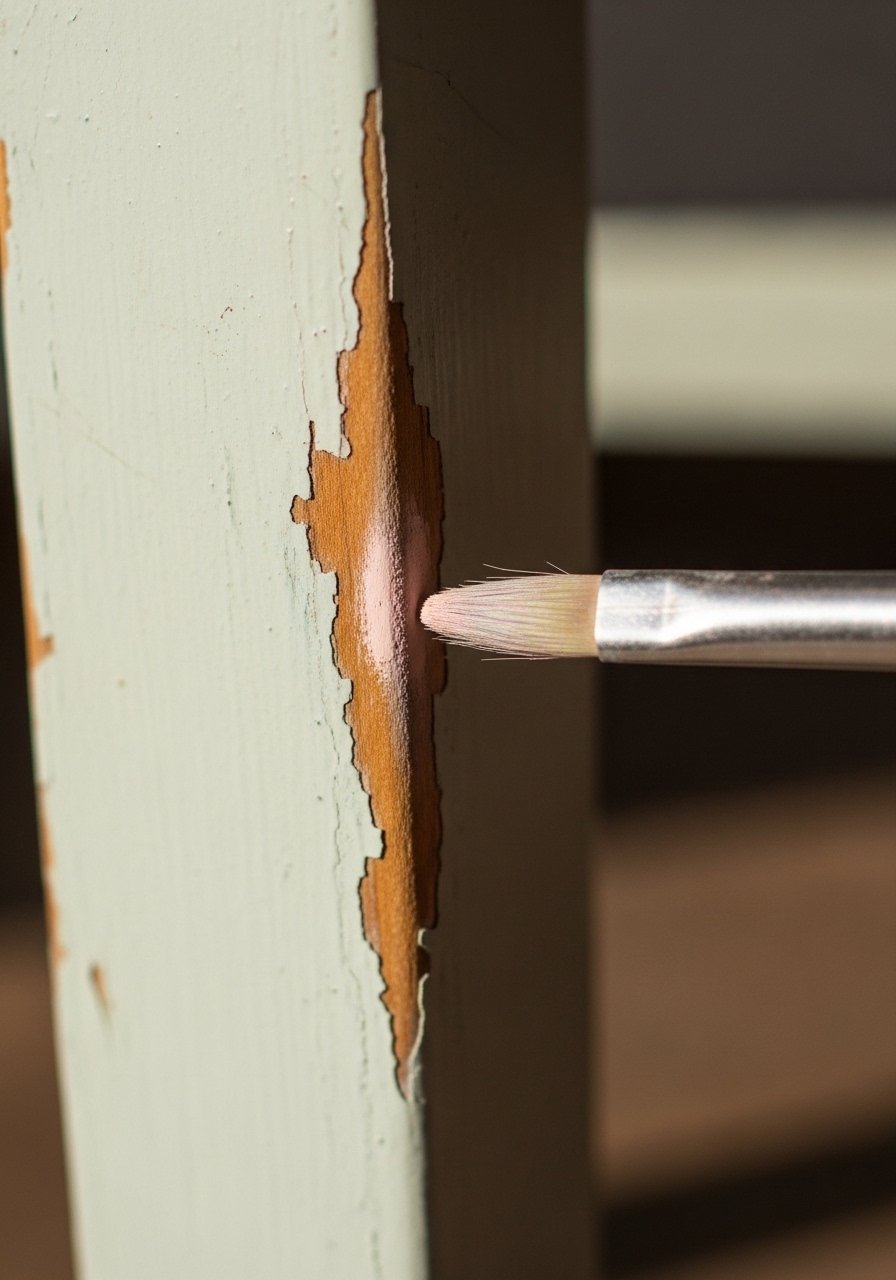
Wallpaper Hole Repair With Finger-Blended Pastels For Vintage Rooms
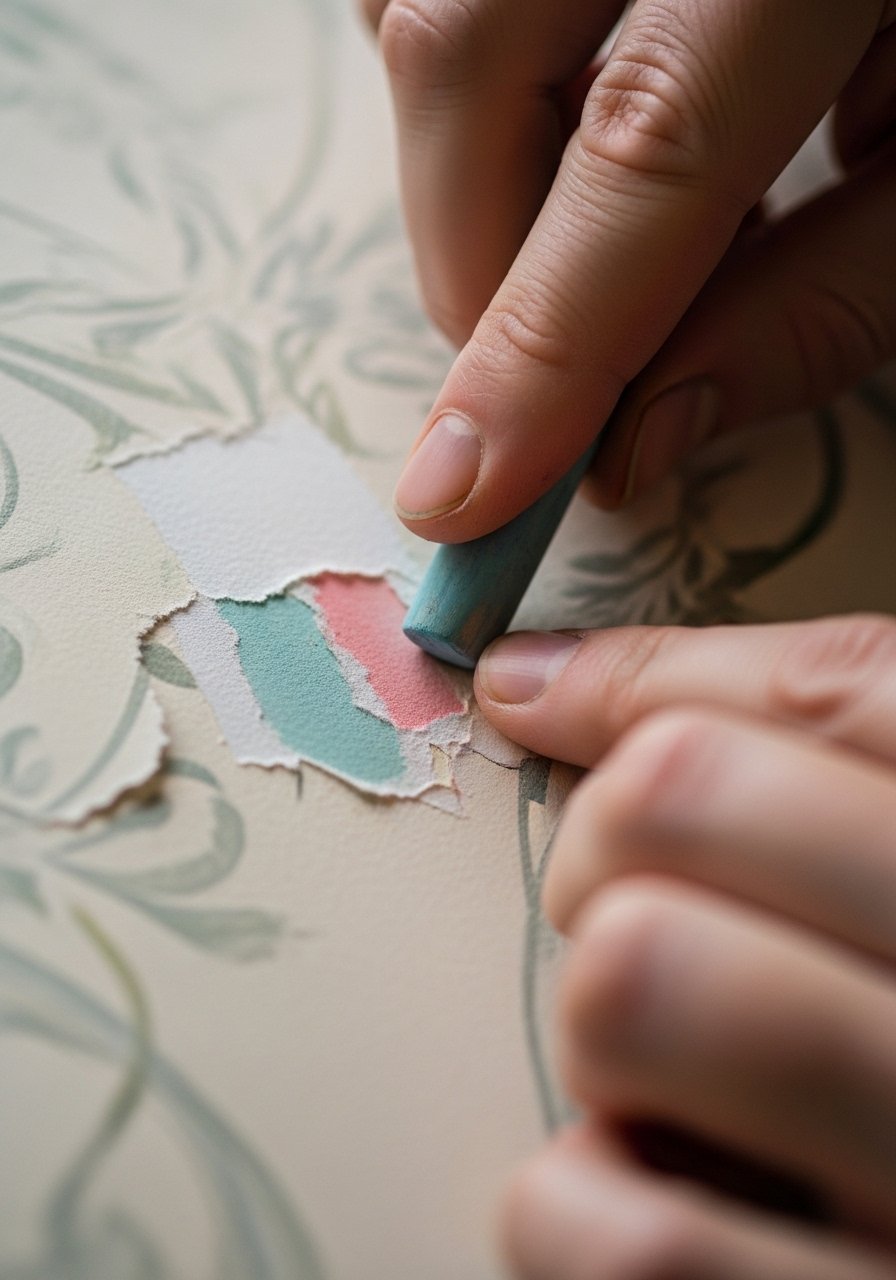
I repaired a wallpaper tear this way and no one guessed it was fixed. The trick is to layer colors, then finger blend to pick up the paper texture. Use soft pastels that match the pattern, and blend until the repair catches the eye only if you look closely. Finger blending pastels for wallpaper holes makes the patch look hand-painted rather than spackled. I used soft-art-pastels-set for the tones. People usually plaster over wallpaper or use bright white spackle and wonder why the patch screams. Also, small apartments with thin plaster need lighter touch and test swatches, not full-on compound. This method is renter friendly and fixes the "wallpaper repairs always look obvious and cheap" problem.
Lath And Plaster Hole Fix Starting With Lath Replacement For Old Homes

Two-thirds of older places need lath love eventually. I used to patch plaster without checking the lath and the crack always came back. Start by replacing loose lath or adding backing strips. Drill pilot holes first to avoid splitting the wood. Use drywall screws to anchor new lath and then apply your scratch coat. For larger holes, add a small backing board behind the lath gap before plastering. I keep a pack of 3-inch drywall screws and a 3/16-inch masonry bit for nearby anchor work. Most folks hit walls first when diving into home fixes. Address the lath and the rest behaves. This step avoids the recurring "lath keeps coming loose" headache.
Plaster Edge Stabilizing Drill Method For Crumbling Corners

If I skip drilling when a plaster edge is loose it pops back out weeks later. Drill holes every 3 inches, 1 inch from the plaster edge with a 3/16-inch bit before you apply adhesive. That lets the adhesive grab the lath and keeps the edge stable. Use a plaster conditioner and push a thin adhesive into the holes before the scratch coat. This is not renter friendly, so check with a landlord first. The common mistake is smearing compound over a flaking edge. Drill, secure, then patch. I use masonry-bit-3-16-inch and a small bottle of industrial adhesive for this.
Peanut Butter Scratch Coat Over Lath For Old House Patching
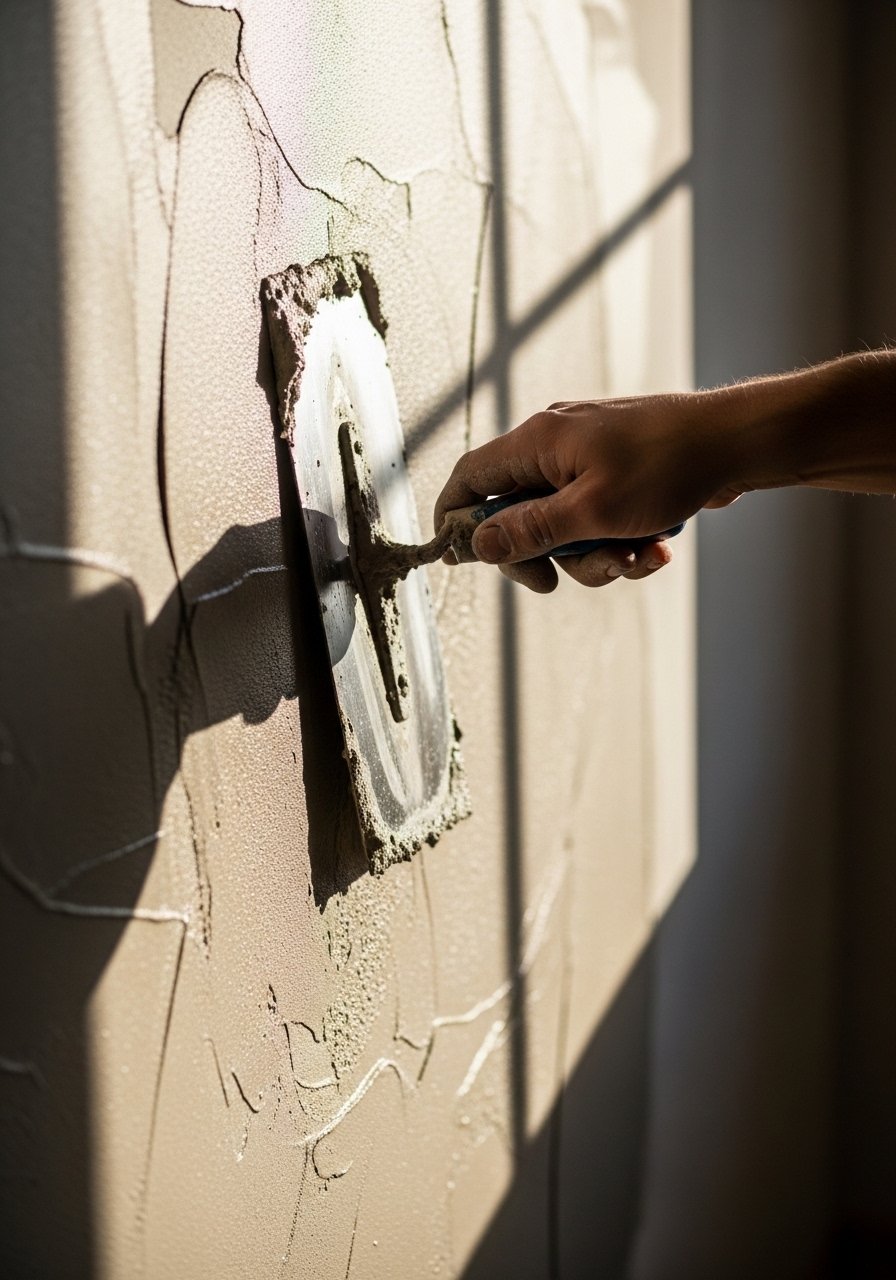
Mix patching plaster to peanut butter consistency and you will avoid sag and shrink lines. I learned this after trying watery mixes that slid off the lath. A proper scratch coat should be thick enough to hold a shallow groove for the top coat to bite into. Recess that scratch coat by half the original plaster thickness so your final surface sits level with the surrounding wall. I use a margin trowel and a small bag of patching plaster. The surprise detail is letting that coat set a few hours before the next step. People hurry and end up with bulging patches. Try patching-plaster-quick-set and a margin-trowel-6-inch.
Three Thin Joint Compound Coats For A Paint-Ready Surface In Any Room

When a patch looks bumpy after paint I usually ask how fast they worked. Do three thin joint compound coats over three days, and sponge smooth the last one. Thin layers dry flat and sand easy. Use a 6-inch taping knife and ready-mix compound for convenience. Between coats, sand gently and remove dust before the next layer. A common mistake is one thick coat that cracks on day two. I keep a tub of ready-mix joint compound on hand and a 6-inch-taping-knife. This method works for bedroom walls and living room touch-ups and pairs perfectly with the lamp gradient idea when you need a flawless paint base.
Pastel Fixative Sealer For Lamps And Furniture That Will Not Smear
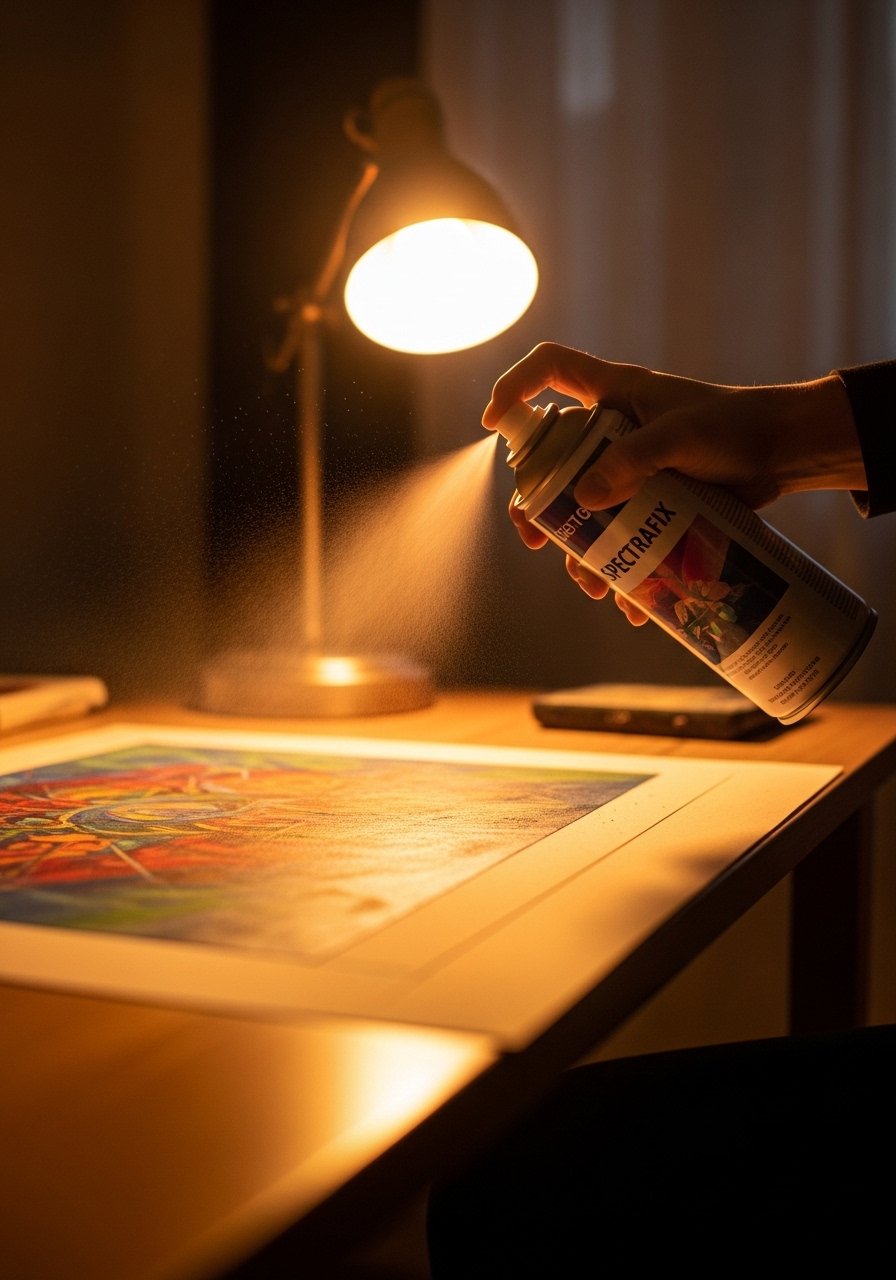
I ruined a lamp once by spraying it with a basic clear sealer and watching the pastels smudge under a wet wipe. Swap the usual sealer for a pastel fixative spray, not matte Rust-Oleum. Fixative locks pastel pigments without changing their hand. Spray outdoors and do light passes. For renter-friendly furniture touch-ups, test in an unseen area. I use spectrafix-pastel-fixative. A fresh angle many guides miss is that pastels on high-touch items should be resealed every year. That keeps color from fading and stops pet noses from smudging an accent chair.
Hallway Pastel Paint Makeover That Opens Tight Spaces

I painted a narrow hallway a soft pastel and suddenly it stopped feeling like a tunnel. Pastels open cramped spaces because they reflect light without losing warmth. Use a satin or eggshell for durability in high-traffic zones and pick a pastel that reads slightly warmer than it looks in the swatch. Budget for one gallon at around $30 to $50 for smaller halls. People often pick pastels that are too cool and the space reads dingy. Try a touch of warm pink or a soft green. For paint I like soft-pastel-interior-paint-gallon. Pair this with the three-coat joint compound finish when prepping older plaster walls.
Spackle For Quick Drywall Dents In Everyday Rooms
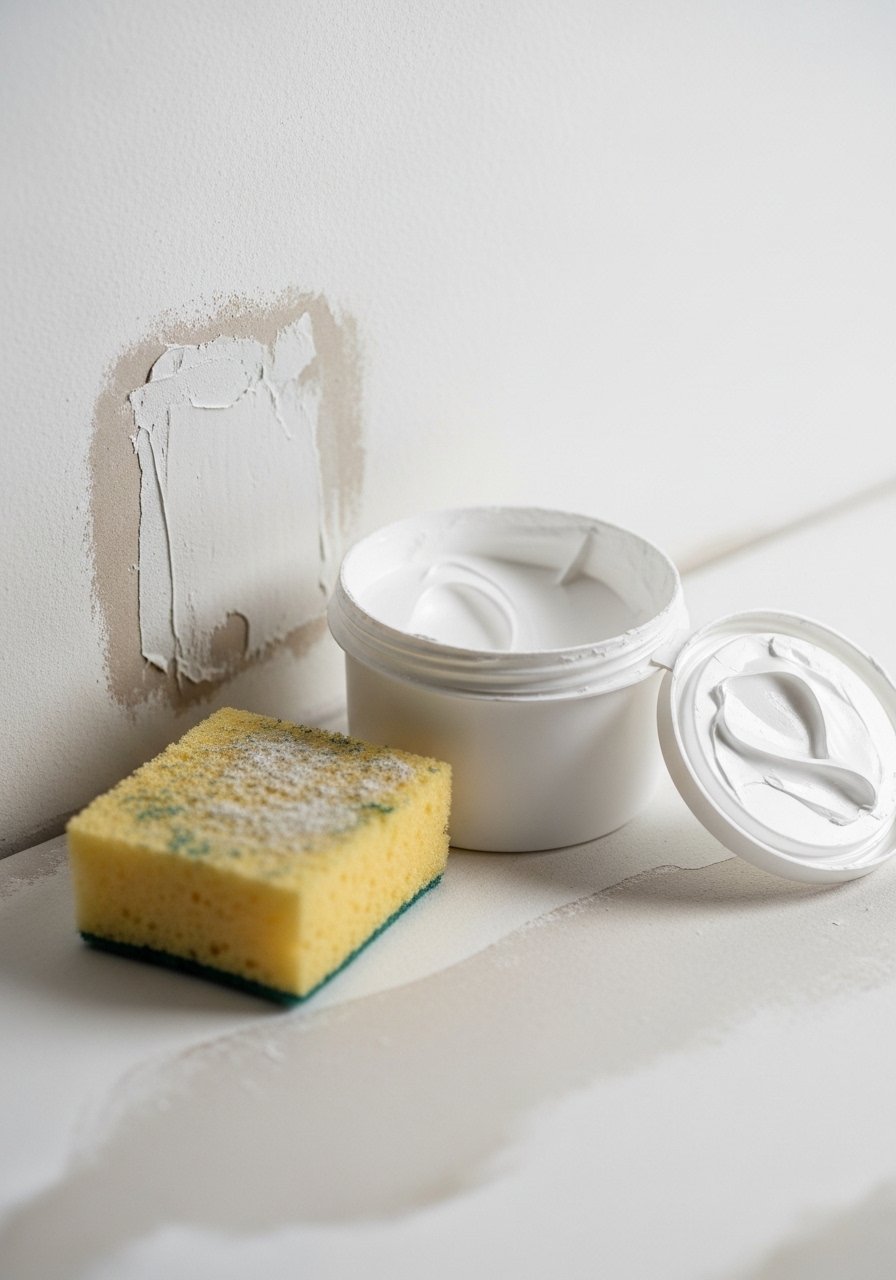
Spackle is the fastest fix for accidental dents and nail holes. For small dents use a lightweight spackle, smooth with a wet sponge, let it dry, then paint. The detail most people skip is feathering the edges so the patch disappears under normal lighting. Budget friendly tubs run under $10 and they save time when you do quick touch-ups before guests arrive. For pet owners look for a durable spackle that resists chipping. I keep lightweight-spackle-tub in the hall closet for emergency fixes. Avoid packing the hole with too much product on the first pass.
Pastel Touch-Ups On Furniture For Scuffs And Chips In Living Rooms
I started using pastels to touch up scuffed painted furniture and the finish looks blended, not slapped on. Mix pastel powder with a bit of clear craft medium for a tint that fills chips in painted surfaces. Seal with a fixative rather than clear spray paint. The small detail I always mention is matching sheen. If original paint is satin, a glossy repair will shout at you. Try pastel-powder-set and a tiny artist brush. This method handles the "sealed pastels smeared into a mess" issue if you use the right fixative and test first on scrap wood.
Pastel-Accented Baseboard And Trim Repair For Subtle Cohesion

When baseboards get knocked, repainting with a matching pastel accent can make the whole room feel intentional. I sand shallow gouges, fill with a flexible wood filler, then tint with pastel pigments to match the wall or trim. Use a small paint pen for narrow trim edges. A detail that matters is keeping the scratch coat recessed by half the original trim thickness so the final paint sits flush. For renters use removable touch-up products and keep records of original colors. I use wood-filler-flexible and pastel-paint-pen. This ties the whole room together when paired with a hallway pastel makeover.
Your Decor Shopping List
- Honestly the best $40 I have spent. Chunky knit throw in cream in 50×60 inches. Drape over the sofa arm for instant texture
- For the lamp gradient, pick up a starter set. Soft art pastels set (
$12) and spectrafix pastel fixative ($12) - For plaster work you need the basics. Patching plaster quick set, 5 lb bag and a margin trowel 6 inch
- Tools that actually matter. 6-inch taping knife (
$6) and masonry bit 3-16-inch ($8) - Budget drywall quick fix. Lightweight spackle tub (~$8). Similar at Target or HomeGoods
- Small repairs for trim. Flexible wood filler, 8 oz and pastel paint pen set
Shopping Tips
White oak beats dark wood in 2026. Design feeds have shifted completely. White oak floating shelves look current, not dated
Grab soft art pastels set for under $15. Swap colors seasonally and the room feels different without new furniture
Curtains should puddle or kiss the floor, never hang halfway up. 96-inch linen panels match standard 9-foot ceilings
One tall plant beats five tiny succulents. If you need low care, get a 6-foot faux fiddle leaf fig for height and zero watering
Frequently Asked Questions
Q: Can I use regular spray sealer on pastel lamp bases?
A: No. Regular clear sealers can smear pastel pigments. Use a proper pastel fixative and test on scrap first. Spectrafix pastel fixative is what I reach for
Q: How do I stop plaster patches from bulging?
A: Recess the scratch coat by half the original plaster thickness and let each thin coat dry overnight. Mixing to a peanut butter consistency helps the scratch coat stick to lath without sagging
Q: What if my wallpaper repair still shows under bright light?
A: Finger blend pastels into the paper texture rather than covering with spackle. Blend in layers and check under the same lighting conditions you live with. Small apartments with thin plaster need lighter touch and test swatches
Q: Is the lath replacement step really necessary for an old house?
A: Yes. Two-thirds of older places need lath love eventually. Loose lath leads to repeating cracks. Replace or screw new lath backing before plastering and drill pilot holes to avoid splitting the wood
Q: How often should I reseal pastel art on furniture or lamps?
A: Plan to reseal yearly if items see touch or are in sunlight. That small yearly coat prevents fading and the "sealed pastels smeared into a mess" problem
Q: What size taping knife should I use for joint compound?
A: A 6-inch taping knife is versatile for most patches. Use thin coats, three over three days, and sponge the last layer smooth for a paint-ready surface